From Thumbnail to Final
Stage 1, The Thumbnail
 |
| The first image, done on a 3" x 3" sticky note. |
Visualizing my personal film
Carry On in terms of a movie poster was useful in focusing my thinking; the exercise of distilling the concept into a single image was an interesting challenge, and I was surprised when it came so easily. Here it all is, showing the Old Man, his oversized suitcase at the airport, and his own challenge as represented by the open frame "sizer" or test container that some airlines have used to control what their passengers may bring aboard.
Incidentally, this is another good example of working small, with no chance to put in too much fussy detail, before you work big.
Stage 2, Full-Size Drawing, 1st Draft
 |
| The first full-scale drawing. |
Attempting a full scale drawing, it became clear that perspective was not just necessary but that I would have to do my perspective drawing in a precise and formal way instead of faking or guessing at the approximate perspective, as it is sometimes possible to do.
Stage 3, Full-Size Drawing, 2nd Draft
 |
| The final pencil drawing. |
This is the final pencil drawing as it was when I brought it into Photoshop for painting. At the edges I had taped on extra paper so that my vanishing points could be extended way outside the range of the image frame. The airplane was originally drawn in at the top, as shown here, so that I could have it on its own layer and then easily adjust its position as seen through the window.
Stage 4, The Digital Drawing
 |
| This shows the digital outline layer as I traced it from the pencil scan. |
Tracing the pencil layer digitally is the cleanest way to get a good line image with a completely transparent background. The line image here is shown over another layer of medium grey.
Stage 5, Tonal Rendering
 |
| The tonal, monochromatic rendering. |
This method of working, where you completely work out your value scale before adding any color at all, is one I have long been curious to try. Sometimes, thinking about color at the same time as you are setting the values (shades of light and dark) can be dauntingly complex. I found that I liked doing it in this way.
Stage 6, Full Color
 |
| The tonal image, now with color added on a new layer. |
Unfortunately, adding color the way I did it reduces the contrast considerably. The technique I used called for creating a second copy of the tonal image, setting the mode of the top layer to Multiply, reducing its opacity to about seventy percent, then creating a new layer in between the tonal layers where the color is layed in. It does work, but, as I say, a lot of the contrast was lost. I have heard of a somewhat different technique which I plan to try next time I do a painting like this.
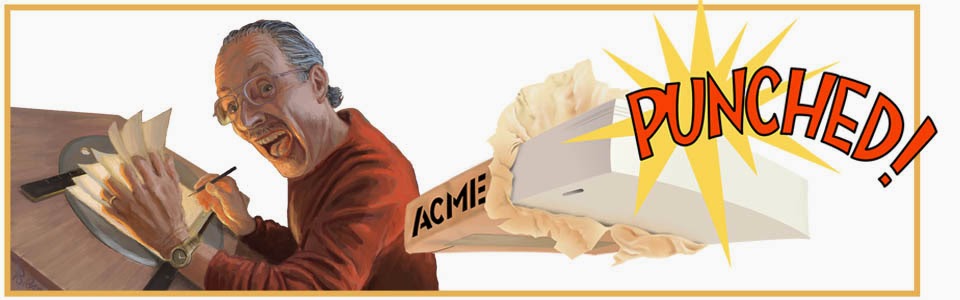
Stage 7, The Final
 |
| The final illustration. |
Here I have added a few brighter highlights on a new layer, cropped the image to printing size, and of course added the text. I am fairly well satisfied with the result.
Next: One more look at that Most Unusual Walk Cycle, with all drawings cleaned up and detailed.


No comments:
Post a Comment