Do you prefer 2D animation to any other kind?.....
Are you willing to endure the hard, tedious work of animation on paper?.....
Are you just plain crazy about drawn animation?.....
Then you may be ACME PUNCHED!
Pages
For People Crazy About 2D Animation!
Acme Punched! is for people crazy about 2D animation. It may be enjoyed by beginners and others, but it is aimed at animators who know already something about the process of animation and the basics of character animation. In large part, it will attempt to provide a deep look into the problem solving that goes on in my head as I work out a scene, often in step-by-step posts that I will sometimes enter in "real time", without knowing in advance what the outcome will be. Mistakes and false starts will not only be included but emphasized, so that the creative process of animation will be portrayed realistically. And, while my own bias is for 2D drawn animation, many of the effects and principles discussed here can apply to CGI 3D animation as well. I hope the blog will prove useful and instructive for all.
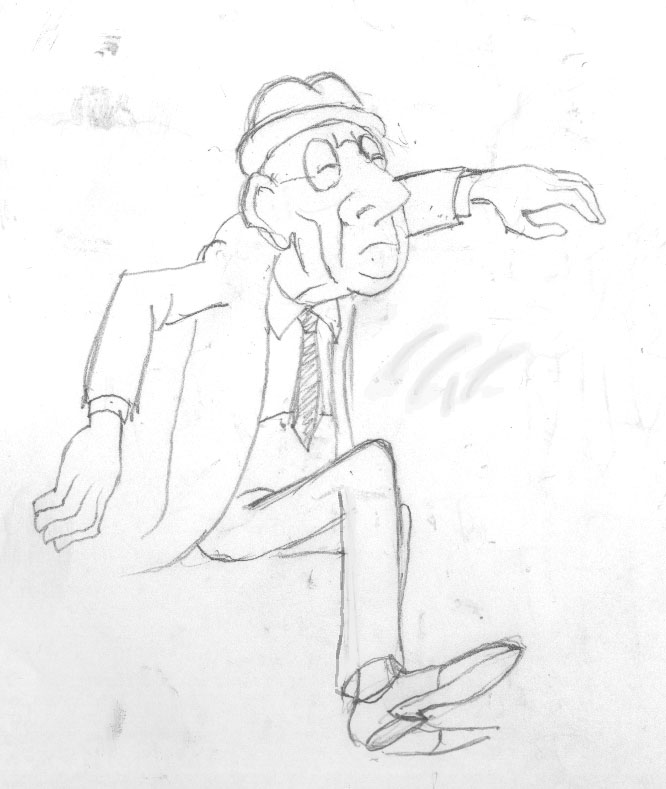
A few days ago while struggling to draw my Old Man character from an unusual angle, I recalled an old technique that I would like to pass along to you.
In trying to draw a difficult head-down view of the character, I was not satisfied with my result. Here is what it looked like at the time.
Not having created a clay or Sculpey maquette of the Old Man, I had only my own traditional model sheet for reference.
Traditional model sheet for Old Man
As you can see, there is a head-down view at upper left, but it is not nearly as severe as I was trying to do. Then I recalled an old trick and decided to give it a try.
I taped a copy of the model sheet right onto my animation board--but not at a level angle; I dropped the right side down so that the profile of the Old Man's head seemed about the same as the angle I was trying for in my drawing. Then I drew a full frontal view alongside, using reference points from the profile view that plotted out horizontally from one image to the other.
Here is a photo taken right from my backlighted drawing disk, with the dim model sheet image showing on the bottom level and the new frontal image on the top level.
The green lines show the corresponding reference points for several features--the top of the hat brim, the top of the ear, the top of the eyeglass lens, the bottom of the ear, the bottom of the nose and the bottom of the chin. Some are not exact, but they get me where I want to go.
After this, I found it a simple matter to now re-draw my three-quarter-front drawing that had been a problem. It came out like this:
New head rendering at left. Original rendering in inset at right.
It turns out in this case that my original isn't so very different from the new head, but the new one on the left definitely is more recognizable as the man in the model sheet. I am satisfied with the result.
So take this tip and drop it into your own bag of tricks. Someday you may want to pull it out to solve a drawing problem of your own!
The Inbetween that Dreamed of Being a Breakdown Drawing
In my last post, No. 147, I talked about planning. About how, if you planned a scene carefully and deeply enough, you might be able to avoid making too many changes after your first attempt.
Now I want to talk about serendipity and the discovery of things while you are working through a scene that can make the scene better, even if you planned it very well.
Often, this happens at the Breakdown stage, where you are making the major drawings between extremes that are so important to the outcome of a scene. I have written about this before, too, but now I want to introduce the idea that a change or idea can occur during the period when you are just filling in the inbetweens that connect up everything else.
Inbetweens are usually described as being the least important drawings. Some of them might even be bad drawings, and it might not matter much that they are bad drawings. In the hierarchy of a big studio, inbetweens are the training ground for new animators, giving them their first sense of the flow of animation drawings and how the whole system works. With inbetweening they learn to curb their own style of drawing and conform to the work of others who are more experienced and to the style established by the model sheets, while at the same time they are studying the extremes and breakdowns that pass before their eyes and between their fingers. Ordinarily, with inbetweens, they are expected not to take liberties and to just place the contours of the drawing they are adding precisely where indicated by the notes--half way between two existing drawings and perhaps following an arc, for example. Admittedly, this can be boring as hell.
But I have an example to show you where an inbetween became more important than usual. It is from this last scene I was working on--the Old Man getting his legs out of the taxi.
Here is the spacing guide that was on the corner of the relevant extreme drawing.
In the pose-to-pose method of animating, which is what I mostly use, the animator would do the most important drawings first, working down to the smaller changes which are the inbetweens. In this case, 117 is first; it is halfway between 103 and 131. Then 113 and 121 would be done next, and so on, each time subdividing, so that the last drawings to be done would be 105 and 129. What I am getting to is drawing 125, which, as shown on the chart, is half way between 121 and 131. (Are you following this? Remember, at this point, drawings 123, 127 and 129 do not yet exist.)
So, 125 ought to have been a straight, mechanical inbetween of 121 and 131. But, I saw something that made me want to change it. Here is what the problem looked like.
Drawing 121
Drawing 131
The two drawings--121 and 131--superimposed as for inbetweening.
The straight interpretation for 125 would have been like this for the leg.
Green line shows the "straight" inbetween position of the leg for drawing 125.
But I saw where I could bring the knee higher here, giving it an extra accent, a little more force or snap, and it came out like this.
Here is the comparison:
The orange line represents the new "improved" leg position.
The new leg position then of course affects the leg in the subsequent drawings 123, 127 and 129.
In a hierarchical studio setting, the inbetweener would not make such a change--not without conferring with the animator first. But finding these opportunities for enhancement is one of the few advantages of having to do all the drawings oneself, as I have to do.
The point is that an inbetween may not always just be a boring, incremental filler drawing that requires no creative thought. Even a lowly inbetween drawing may turn out to be something special.
So, stay alert for serendipity, even when inbetweening!
Wherever you find yourself in your knowledge and understanding of drawn or other hand-crafted animation, I hope you are always trying to push yourself a little higher.
If you get too good at your game, then you are coasting and not learning anything new. Where is the challenge and the joy in that? So, up your game; make it harder for yourself. If for a master guitarist that means learning to sling the guitar behind and keep on playing, like Jimi Hendrix, for an animator it might mean something more subtle like learning to time movements to the frame before even making any drawings except the key (story-telling) drawings.
For an animator with less experience, how about making a walk cycle that is so full and natural that other people can watch it for a whole minute without tiring of it?
Or you might be ready to try some dialog animation that is a bit beyond what you have done before.
It is important to reach out just a little ahead of yourself, and not reach too far at once. But it is important to reach ahead.
For myself, in the interest of minimizing the instances of re-drawing and re-timing of animation that I have seen in my pencil tests, I am basically trying to learn the skill of visualizing accurately and in great detail the scene I am starting in on.
You start usually with the drawings from the storyboard, and they give you some ideas about poses and expression, but the detail is never nearly enough at the storyboard level. If you are animating a character in dialog, then the actor's reading of the lines will help to guide you and inspire you--but you will also be limited. If you know a character has a line before going outside that lasts only 42 frames, then you don't have time to show him putting on his coat as he says it.
Pantomime or non-dialog animation has more freedom but it has no actor's input to help you. It's just you and the storyboard. How long does it take an old man to get out of a taxicab, for example? Many animators work with a stopwatch or a fixed beat (such as 12 frames, or a half second) that they have learned so well that they start their pencil tapping to that beat as they think about the movement.
Thinking about the movement: how important that is, and yet how elusive it can be. I suppose some animator's get it more naturally and quickly than I have, but it is hard to do at a deep enough level.
Let's look at my example of the Old Man getting out of the taxi. Storyboard shows that he opens the door, that he gets his legs out one after another, and then sits sideways on the seat with his feet down on the pavement.
Is that all the farther you have to think into it? No. This is an old man, and he is still capable, but he does move in a slow and deliberate way most of the time. Now I am seeing him. He might even experience a little pain in the movement that he must make to get his feet up and over the doorsill and onto the ground, one after the other. In this scene he does not stand up at the end, so there are three major moves here: 1] he opens the taxi door, 2] he brings out his right foot, and 3] he brings out his left foot. Two smaller moves are also obvious to me: 4]he braces his hands on the seats for leverage and 5]he sits up and comes to rest at the end.
In former years I might have failed to think it through this far. I might have picked up my pencil and started doing pose drawings without enough thought and ended up with someone who got out of the taxi with the ease and grace of a young actor playing James Bond. Then, of course, I would have seen my mistake, and done it over.
And, I admit, that is one way of doing something: do it wrong, look at it, and fix it. Do it wrong, and then do it right. This works. I should know, as I have been doing it that way for years.
But this is the thing: I am trying to learn if it is possible to do it right the first time. And I don't expect that I will ever be able to do it right the first time, every time. But I would like to be able to do it right the first time, some of the time. This is how I am now trying to Up My Game.
Much of it is in what is called the animator's thumbnails. Thomas and Johnston talk about this, and so does Nancy Beiman, and so does Eric Goldburg. This is the name for the deep thinking of the animator before she or he animates. It is thinking with a pencil, deeper ever than the storyboard can go. You don't just visualize the actions; you visualize the anticipations. You try to visualize where there will be overlapping action, and why. You try your best to really see it all, and miss nothing, and your thumbnail drawings are your scribbled notes so you can remember what you are visualizing in your mind. You are thinking it through with attention to pressure and weight and effort and tension and slackness. You do your best to see it in your mind as if on the screen. The only things you may not need to consider are color and texture.
You do it as best you can. I think I am getting better at it. This scene of the Old Man getting out of the taxi came out pretty well, the first time through. Here is the first pencil test of it with all of the drawings in. See what you think.
I like it pretty well, but after he gets his second foot out, he sort of jerks forward, letting go of his handholds. Also, the taxi door comes open too fast. Some of those drawings are on ones (a single exposure for each drawing), so I put them all on twos.
Fixing this, I tested it a second time:
I feel this is much better, but now I see something else--how his head turns too quickly when he looks forward to the head rest where he will put his left hand.
So I fix this also, and:
Now I feel that this scene is as good as I can get it. It is time to let it go and get on with the next scene. I will keep trying to get it right on the first try. Little by little, I will get closer to being able to do that. Just a little closer...