Pages

For People Crazy About 2D Animation!

Acme Punched! is for people crazy about 2D animation. It may be enjoyed by beginners and others, but it is aimed at animators who know already something about the process of animation and the basics of character animation. In large part, it will attempt to provide a deep look into the problem solving that goes on in my head as I work out a scene, often in step-by-step posts that I will sometimes enter in "real time", without knowing in advance what the outcome will be. Mistakes and false starts will not only be included but emphasized, so that the creative process of animation will be portrayed realistically. And, while my own bias is for 2D drawn animation, many of the effects and principles discussed here can apply to CGI 3D animation as well. I hope the blog will prove useful and instructive for all.

-Jim Bradrick

Tuesday, August 26, 2014

No. 72, Rare Animation Books: The Art of Walt Disney, by Feild

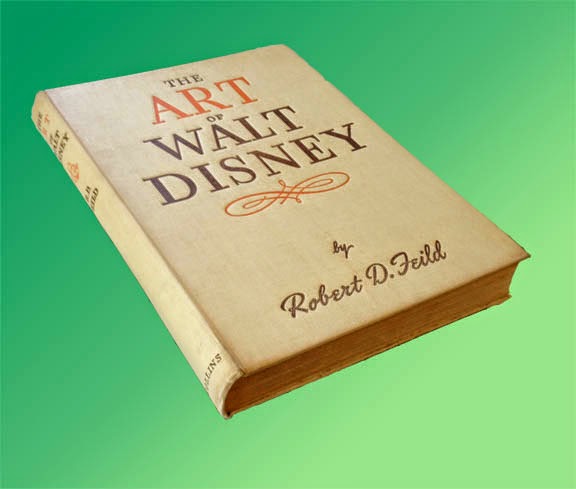
The Art of Walt Disney, by Robert D. Feild, 290 pages, pub. 1942 by Macmillan and Co.


First, you should understand that there are  two completely different books called The Art of Walt Disney. The better known of these is the most recent, a massive coffee table book by Christopher Finch first published in 1974.  In fact, when I went to Amazon just now to look at reviews of the earlier Art of Walt Disney, I found that all the reviews seemed to be of the 1974 book; all these people had no knowledge of the one published in the 1940s.  But the Finch version, rich in color artwork but short on real information about the animation studio, was for me a vast disappointment.

The other book known as The Art of Walt Disney was published in 1942 and written by a professor of art who was given a year of access to the Disney studio in Burbank between 1939 and 1940.  An interesting year it was, too, for Snow White and the Seven Dwarfs had premiered successfully in 1937, proving the viability of feature-length animation and spurring the studio to initiate production on not one but several new features.  The book therefore contains details on the production of Pinocchio, Fantasia, Bambi and Dumbo, all of which were in various stages of development, as well as many animated short subjects which were still a major division of production at Disney.

Early concepts of the 7 dwarfs. Some of these are by Albert Hurter.


As an art historian Feild admitted to a quandary about what the animated productions of the Disney studio actually meant as art, but he knew he was onto something big and exciting.  Disney the producer had thrown far more money back into raising the standards of animation than he had kept for himself, and the result was a clear lead in production quality and standards over every other Hollywood studio.  Efforts by other countries, from the Disney point of view, did not even exist.

Layout sketches, possibly by Tyrus Wong.


The book itself was the first serious literary survey of Disney or of any animation, and its publication was a tribute to the new recognition and respect accorded to Walt Disney after his sensational breakout from shorts starring Mickey Mouse, Donald Duck and Goofy into the world of feature films.  For an exhilerating two years or so after the release of Snow White, anything seemed possible and the continued success of the studio seemed assured.

World war beginning in  1939 with Hitler's invasion of Poland ended all that, closing lucrative distribution markets in Europe and, after 1941, diverting much of the studio's energy into jingoist war propaganda.  According to a 1942 review in Saturday Review, however, the book went to press before the December, 1941, bombing of Pearl Harbor, and so Feild's writing was not influenced by the direct involvement of America--and Hollywood--in World War II.

These may be examples of Shamus Culhane's "fast animation" technique.


There is an oft-told story of Walt Disney confronting one of his ambitious young artists back in the '30's, telling him not to get any ideas about making a name for himself at the studio; the only name the public was to see was that of Walt Disney. The story is true, though of course the features from Snow White on had artist credits just like any other feature films.  But Feild in his book maintained Disney's attitude about keeping the artists anonymous, and so there is not a single animator or designer mentioned by name in the entire book. From the point of view of historical interest, this is an unfortunate omission, although subsequent writing over the ensuing decades has illuminated some of this darkness. One can easily recognize the work of Marc Davis, of Milt Kahl, of Rico LeBrun and others.

Some of Preston Blair's dancing hippo drawings, made famous in his animation book.


The text  is written in a somewhat verbose style typical of the day, but the book does a good job of detailing the Disney production process and even makes an attempt to describe the intricacies of animating. Much is made of the expansive new Burbank production plant. Yet the refusal to name names continues to be an irritant throughout.  Besides Walt, only Roy Disney is mentioned by name.  How can you tell the story of Walt Disney without mention of Ub Iwerks?  Of Ham Luske and Norm Ferguson and Bill Tytla and Freddie Moore?  Yet Feild manages to keep them all behind the curtain, to the point that I suspect this anonymity was a precondition imposed on him by Walt.

Uncredited like all the others, here are some structural guides for deer animation by Rico LeBrun.


Nevertheless there are many full-page plates or illustrations, some in color, that make the book a worthwhile document of the Disney studio in the early 1940s.

Animation drawings of Ali the alligator, very possibly by John Lounsberry.


Feild's The Art of Walt Disney is considered a collector's item.  My copy is a British reprint (1944) published in London by Collins.  Copies available on the internet are few and  not inexpensive, but it is still possible to get one if you want it badly enough.


Sunday, August 3, 2014

No. 71, Me vs Toon Boom StoryBoard Pro, Part Three


The Moving Storyboard


Now we get to the point where StoryBoard Pro is not just a storyboard platform but also a tool for creating an animatic. Like the storyboard itself, the animatic is a planning tool for discovering the best way to tell a story and for discovering problems before all the expense of creating animation and full production art.  Where a live-action film maker might shoot footage at a ratio of ten feet for every foot used in the final edit, the goal of the animation studio with its highly expensive and labor intensive production cost, was a ratio of one to one.  The storyboard and especially the animatic could make that happen.

Originally called a Leica reel, the animatic is a filmed (or videoed) storyboard, with the duration of each panel timed to play as nearly as possible to the calculated length of the same action in the final animation.  Thus an accurate animatic lasting ten minutes and twenty-two seconds onscreen will represent the final production lasting the same amount of time.

One thing that SBP can do is help the animator to accurately time transitions and certain types of movement upon the screen.  Here is my first example from the developing storyboard for my new film The Two Washingtons.


This is the establishing shot for the whole film.  Looking through the grid of a window, we see a huge jet taking off.  An appropriate sound effect will be added.  Then we dissolve to the interior of the airline terminal building, immediately pulling away from the window and widening out to reveal the large gate area crowded with people waiting for their flight to be called.  The background sound will change to the ambience of an airport building, with murmurring voices, footfalls, and the occasional PA announcement.

To accomplish this little sequence I used three of SBP's effects: 1) an animated layer (the airplane), 2) the cross-dissolve from the airplane shot to the interior shot, and 3) a long camera truck-out from the window to a wide shot of the whole room.

Let's think about it piece-by-piece.  The airplane shot might have taken from two to four frames of a conventional storyboard.  Limited to that, I think I would have done it like this:

How this shot might look in a conventional storyboard.


But SBP allows me to do it with just two drawings, the airplane and the window grid, and the result is about as good as I could hope to make it in the final film!

The Animated Layer


The animated layer is about as simple to do as can be.  You select your panel, then the layer you want to animate.  (Of course you will have to have planned this as you constructed your storyboard, so that anything moving will be on its own layer.  If you think something in a scene might move, or of course if the background is to be used in more than one panel, then you should be thinking and working in separate layers.) Next, you use the First Frame Transform tool and manipulate the image to its beginning position.  All the basic transform functions are available, so you can not only reposition but scale, skew, rotate, and so on.  In the case of the airliner, I slid it down out of the camera frame at lower left and also scaled it proportionally down.

The green rectangle is the camera field.


Then I clicked Last Frame Transform and pushed the airplane image off the screen at upper right.  Done!  The plane appears to be taking off outside the window, growing larger as it rises.


This is not actually the last frame position, because that happens near the end of the cross dissolve and is therefore nearly transparent, but it is near the end.


Camera Move

The second panel is done not as a layer move but as a camera move.  With the chosen panel selected, click on the Camera symbol in the toolbar, then open Tool Properties.

Tool Properties panel for Camera
As I am still learning this program, I do not yet fully understand the sections of this panel called Selected Keyframes and Static Attributes.  Here we will be concerned only with the top section, Camera Transform.

From left to right, the first three symbols are: 1) Set Keyframe at Beginning of Panel, 2) Set Keyframe at Current Frame of Panel, and 3) Set Keyframe at Last Frame of Panel. In my shot of the airport interior, I have used just 1 and 3, because the camera is to move throughout the shot. It is important to set both these keyframes, first and last, before moving your camera.  When you do this, the camera fields start out the same for both frames, so they are superimposed.  But at the bottom of the field, there is a green square for the first frame and a red square for the last.  Click and drag on each of these squares to adjust your opening and ending positions.  Here is what mine looked like after making those moves.

The panel in Camera View, clearly showing the move from start (green) to finish (red).


Note: a change in rotation is also possible here, as for example I could have rotated the green window so that the horizontal window bars started out parallel with the match shot in the previous panel.  I decided this was unnecessary however.

I am not quite finished here.  Rather than have the camera move at a constant rate, I decided to add ease in and ease out on both ends, but at different rates.  To do that, go to the Ease In, Ease Out lines in the Camera Transform box and just enter values for the durations of those eases.  In this case I chose 10 frames for the ease in (less than half a second at 24fps) and a full two seconds for the ease out.  These are easy to keep adjusting until they feel right.


The Transition

The last thing I have to do in this little two-panel scene is to add a smooth transition between panels. Find the New Transition icon in the toolbar and click on that.  I want to do a simple cross dissolve, which is the default option. There are also some wipe options.  Select the transition you want by double-clicking on the transition symbol on the timeline, or use the panel view.  The duration of the transition can be changed by pulling the edges of the transition symbol to left or right in the timeline.

Again, I applaud the ease of use of these functions.  I figured all this out and set it up in far less time than it took to write about it.


Next time I will show you another example of camera work in SBP, and I will also talk about some drawing options that are not available in Animate or Animate Pro.